01 December 2009

~ Piroshkis

Dear Fans of Hounds Who Cook,
We dogs are happier than usual, having had a near-two-hour walk today down to the river and round about town. We wore our packs to carry things of interest. And when we returned home, even The Gute was beside himself with joy. Gute does not play,  per se, as he is a serious sort of hound. But when he does play, it's very puppy like and typically his bounds are as high as they are long. He bounded about down the hallway chasing toys for a full 8 minutes before resuming his usual immoveably sleepy hound position on the bed.

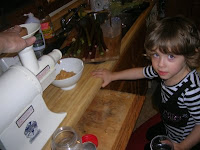
Meanwhile, I Eli, have been investigating a new culinary tool our girl brought home from the resale store yesterday. (We know when she's there as we each get a small stuffed animal to rip mercilessly apart when she comes home. We think they are free with purchase.)

The tool is a Piroshki maker (or Perogie or Pirozhki) but you can make this recipe easily without our special tool. Our girl used to eat these up from the Russian Teahouse in St. Paul Midway neighborhood and now we dogs can make them for her. (Well, not Guthrie. He won't wake up til 11 p.m., but I Elias will make an attempt.)

I started with a recipe from allrecipes.com and houndified it as usual for extra goodness. 


Russian Pirozhkis
The Dough
2 cups milk, warmed (we used sour milk for extra flavor and added 1/2 tsp. baking soda to balance it out)
1 tablespoon white sugar
1 tablespoon active dry yeast
2 tablespoons butter, melted
1 egg
1 teaspoon salt
6 cups all-purpose flour
    The Filling
    1 tablespoon butter
    1/2 medium head cabbage, finely chopped
    6 hard-cooked eggs, chopped
    1 pound sausage (we used italian, in spite of it being a russian dish)
    salt and pepper to taste
      Place 1/2 cup milk in a cup or small bowl. Stir in sugar and sprinkle yeast over the top. Set aside until foamy, about 10 minutes.

      Pour the remaining warm milk into a large bowl. Add the melted butter, egg, salt and 1 cup of flour. Stir in the yeast mixture (which should be foamy by now). Mix in flour 1 cup at a time until dough pulls away from the sides of the bowl and doesn't stick to your hands. Cover the bowl loosely and set in a warm place to rise for about 1 hour. Dough should almost triple in size.

      Meanwhile, saute the sausage, breaking it into bits. Set aside.

      Melt the remaining butter and saute the cabbage til it has wilted. Mix in the chopped eggs and cooked sausage and season with salt and pepper. Continue to cook, stirring occasionally until cabbage is tender. Set aside.

      Place the risen dough onto a floured surface. Divide dough according to method of making the peroshkis. This recipe makes about 30 peroshkis. Using a peroskhi cutter like ours makes 18 at once, so we divide the dough into 4 sections (for 2 top layers and 2 bottom layers of 18 piroshkis each.)  Roll out one section of dough and lay over the piroshki mold. Fill pockets with about 1 tablespoon of filling. Roll another section of dough out and lay over filled pockets. Use rolling pin over the mold to press and cut the piroshkis.

      If you are not using a cutter, form dough into a 2-inch diameter roll and cut into 30 one-inch pieces. Flatten the balls by hand until they are 4 to 5 inches across. Place a spoonful of the cabbage filling in the center and fold in half to enclose. Pinch the edges together to seal in the filling.

      Preheat the oven to 400 degrees F (200 degrees C). Place the piroshkis on  baking sheets two inches apart to allow the dough to rise. Bake for 20 minutes in the preheated oven, or until golden brown.

      Notes from Elias: We are sure that the bread should be brushed with something before entering the oven. Tonight we are experimenting with what: milk, egg white, egg yolk, olive oil, or ? and will let you know what is best. 10:48 p.m.: Egg Yolk wash, paws down. Works of art.


        25 November 2009

        ~ Garlic Mashed Potatoes, Exactly Perfect

        Dear Fans of Hounds Who Cook,

        We could hardly believe our own senses today when we experienced the odiferous wonder of garlic and butter roasting in the oven. Our girl was concocting what may soon come to be known the best garlic mashed potatoes known to Man(kind), but until then we will just refer to them as Exactly Perfect. She found chefly secrets online at this locale: (reluctantgourmet.com) and then whupped up this exquisite garlic sauce that can be used in potatoes or a whole variety of foods. You'll see what we mean as you wisely read on. It's all in the technique, which has somehow eluded our cooker until now. These are the principles she learnt: 1) Boil the water first 2) Scald the milk before adding it 3) Add the milk last (after lumps are out of potatoes) 4) Nutmeg removes the "stored" flavor of potatoes. Who knew? 5) It's ok to make mashed potatoes ahead if you keep them hot (a crock pot works!). They don't reheat well after cooling.

        Garlic Mashed Potatoes
        Me's Independent Rating: 3 of 3

        5 lbs. potatoes
        2-1/2 cups milk (more or less)
        10 oz. butter
        1/2 cup Garlic Sauce (see recipe below)

        Kosher salt
        Pepper
        Nutmeg


        Potatoes can be steamed, pressure cooked or boiled. Heat the water in advance in each case. Pare and cut potatoes. (Keep in a bowl of cold water if you prepare them ahead.) Place into (or over) boiling salted water and cook til tender but not falling apart. For a pressure cooker this was about 8 minutes for quartered potatoes. 


        Drain potatoes and puree immediately with butter, garlic sauce, and nutmeg until smooth. Don't worry about overbeating at this juncture. 


        Meanwhile, heat milk to scalding. When potatoes have no lumps, gradually beat in hot milk to the desired consistency. Do not overbeat. Pepper and salt to taste. Transfer potatoes to a crock pot to keep hot until serving.


        Garlic Sauce  

        1 pound (?!) garlic
        1/2 lb butter, unsalted
        1/4 lbs onion
        1/4 tablespoon white pepper
        1 tablespoon Kosher salt

        Peel garlic and place in oven proof bowl. Cover with butter and onion, pepper and salt. Seal with aluminum foil and bake at  375F for one hour. The garlic will be very tender and lightly browned. Puree. Use for Garlic Mashed Potatoes, Roasted Garlic Sauces, Pastas with or without Cream, with Mayonnaise on Sandwiches (Roasted Garlic Aiioli). Keep refrigerated to store. 

         
        Notes from Guthrie: Lick the bowl immediately before the residue turns to a hard glue that will take a lot more licking to get off.

        03 November 2009

        - Pumpkin Soup

        Dear Fans of Hounds Who Cook,

        Here we are, pups after Halloween with so many jack-o-lanterns. We baked them up (they were only outside for the evening glowing with candlelight) and froze the puree in pint bags. We noted which ones came from darker dense pumpkin (cooking pumpkins) and the lighter watery pumpkin (carving pumpkins) so when we go to cook with it we can adapt the pumpkin accordingly. (We will drain the light stuff some more and not expect the deepest pumpkin flavor that the darker flesh will yield.)

        We searched our favorite epicurious.com and found this Delicious recipe for pumpkin soup. We ate it with whole wheat french bread slathered in Butter.

        Spicy Pumpkin Soup
        • 1 1/2 tablespoons butter
        • 3/4 cup chopped carrot
        • 3/4 cup chopped celery
        • 3/4 cup chopped ripe banana
        • 1/2 onion, chopped
        • 1 garlic clove, minced
        • 1 bay leaf
        • 1 whole clove
        • 5 cups low-salt chicken broth
        • 2 cups canned pure pumpkin
        • 3/4 cup canned unsweetened coconut milk*
        • 1/4 cup sweetened condensed milk
        • 1 teaspoon ground nutmeg
        • 1/2 teaspoon ground cinnamon
        • 1/2 teaspoon ground coriander
        • 1/2 teaspoon crumbled dried sage leaves
        • 1/4 teaspoon ground allspice
        • 1/4 teaspoon yellow curry powder
        • 1/4 cup chopped fresh cilantro
        Melt butter in heavy large pot over medium-high heat. Add carrot and next 6 ingredients and sauté until vegetables are soft, about 10 minutes. Discard bay leaf. Transfer mixture to processor and blend until smooth. Return mixture to pot. Add broth and all remaining ingredients except cilantro. Boil soup over medium-high heat 15 minutes to blend flavors. Cool slightly. Working in batches, puree soup in blender until smooth. Return soup to pot. Season to taste with salt and pepper. (Can be made 1 day ahead. Cool slightly, then cover and refrigerate.)

        Bring soup to simmer. Divide among 8 bowls. Sprinkle with cilantro and serve.

        *We used dried coconut cream powder and diluted it twice as much for the coconut milk. 

        31 October 2009

        - Pumpkin Cookies

        Dear Fans of Hounds Who Cook,

        It's a real halloweeny day with winds and leaves flying and a kind of irrevocable chill where it's not too cold yet, but you know there's  no more Reprieve coming. Such as an Indian Summer day where a dog could lie in the sun in the grass and wonder about rabbits. No more of those days.

        Our girl was carving pumpkins for the trick or treaters who will come tonight. She saved the seeds for us - froze them raw and will dole them out in our food (ground up) as the months go by. They are full of nutrients. So we came to have a source of Pumpkin. Some of the jack-o-lanterns had light colored and somewhat lightweight insides. Others, though, had a dense, dark orange meat with more sliminess to it and we knew that was the good cookin kind.

        We have had in mind The Pumpkin Cookie for some days, so now we find ourselves with pumpkin to make them and all that we need. Here's the recipe we found which we have altered to our hound tastes. The original is at recipezaar.com.

        Eli's Pumpkin Cookies for Reformation Day (also Halloween)
        1 cup butter
        1/2 cup sugar
        1/2 cup firmly packed brown sugar
        1 cup fresh pumpkin puree, drained (or use canned)
        1 egg
        1 teaspoon vanilla extract
        2 cups whole wheat pastry flour (or use white)
        1 teaspoon  baking soda
        1 teaspoon baking powder
        1/4 teaspoon salt
        2 teaspoons cinnamon
        1/2 teaspoon nutmeg
        1/4 teaspoon cloves
        1/4 teaspoon mace
         

        Penuche Glaze
        3 tablespoons butter
        1/2 cup firmly packed dark brown sugar
        1/4 cup milk
        1 1/2-2 cups powdered sugar


        Cream butter and the sugars together until light and fluffy. Blend in pumpkin, egg and vanilla extract.
        In separate bowl, stir together flour, baking soda, baking powder, cinnamon and salt. Mix flour mixture into butter-sugar mixture.

        Drop tablespoonfuls 3 inches apart on ungreased baking sheets. Bake the cookies for 10-12 minutes until golden around the edges. Transfer cookies to racks. Let cool completely for a least one half hour, then drizzle with glaze.

        For Glaze: In a medium saucepan, heat butter and brown sugar over medium heat until bubbly. Cook, stirring constantly, for one minute or until slightly thickened. Beat in the milk. Blend in confectioner's sugar until the glaze is smooth and spreadable. Drizzle over cookies. Glaze will harden quickly - keep the saucepan warm to prevent it from hardening.

        Notes from Elias: This is really my recipe as I am the dog who eats the most pumpkin. Pumpkin is good for dogs. We baked up our pumpkin (instead of boiling, which just adds more moisture, we presume), took off the peel (which we dogs ate right up), and ran it through a food mill to puree it. Then we let it sit in a sieve to drain extra juice (which we dogs also ate right up). Canned pumpkin might make a denser cookie, but not, we believe, a better cookie. 

        12 October 2009

        Healing Chicken Soup Reprise

        Dear Fans of Hounds Who Cook,

        We dogs were most surprised when we ran out the door this morning and found...snow. It is only October and we think we will break the all time record for snow on Oct. 12. The record is from 1909 or so - 1.7 inches.

        So, as is obvious, what with early snow, it was a day for chicken soup making. We are  bringing back our favorite recipe from last year with some updates for 2009. You can read the original to find out how this is a soup scientifically proven to help you heal. (Or, read the Actual Study.)

        This will help you heal faster if you're sick and boost your immune system if you're feeling fine, to keep you feeling fine.

        We found a big 10 pound pack of chicken quarters on sale and it turned out that all of the packs of parsnips and turnips and the like were double what we needed - so we doubled the recipe and used all 10 pounds of bird. We also had just harvested the celery and parsley from our garden (before the snow) so we used homegrown. Mmm. Fresh. Our batch made about 8 quarts of soup for freezing.


        With this recipe, you end up with extra cooked vegetables for another use and extra chicken for another use...but include the full quantity for the broth to fill out the flavor and make it extra healthy. Some people discard the extra veggies. You could mash them for a yummy side dish, or feed them to your pups if you leave out the onions.

        Here's how we did it:

        Healing Chicken Soup 
        Me's Independent Rating: 3 of 3

        10 lbs. of chicken
        6 cloves of garlic (or more - it's all we had)
        1 small pumpkin (or 2 sweet potatoes) (= 1 lb)
        20 oz. parsnips (its the size of our bag...use whatever you have, a pound or so)
        20 oz. turnips (ditto)
        1 lb. carrots
        3 lbs of onions
        1 bunch celery (with leaves)
        2 bunches of parsley
        1/2 ounce Hiziki (or other sea vegetable...this is like seaweed or kelp)
        1 Tablespoon salt
        1 Tablespoon pepper

        Soak the chicken in salt water 20 minutes and pat dry. Or skip the salt water and just rinse the chicken. Place in a big electric roaster. Cover the chicken with cold water. Bring to a boil. Meanwhile peel the pumpkin, parsnips, turnips, carrots, and onions. Leave them whole or in large pieces. Add to the chicken and boil 30-45 minutes, just until chicken is cooked.

        Remove the chicken and large vegetables from the roaster and set aside. Skim fat from the broth, or pour in batches through  gravy separator to remove the fat. Add the celery, parsley, hiziki and salt and pepper to the broth in the roaster. Dice about half of the vegetables and add to the roaster. Save the remaining vegetables for another use. Simmer soup 30 minutes.

        Remove chicken meat from about half of the chicken. Save the remaining chicken for another use. Dice chicken meat and add to soup. Season with additional salt or pepper to taste. Heat through and serve.

        Notes from Elias: For the sick and ailing, strain all of the veggies out and serve plain broth. Puree the veggies for a delicious side dish for later. Use the remaining chicken for chicken enchiladas!

        Notes from Gute: We dogs love this day because we are allowed a lot of scraps and licking of pans when it's all over. 

        Post Script: Now, only 3 days later, all 8 quarts are gone. We fed soup to loggers clearing brush in the back yard, sent some home with two sick people, and had a little ourselves...

        03 September 2009

        - Amish Friendship Sourdough Pancakes

        Dear Fans of Hounds Who Cook,

        Erstwhile gifted to us was a ziplock baggie of Amish friendship bread with a recipe attached. Every day you squish the bag or add flour, according to the regimen listed. On a certain day, you split off 4 quantities of it in new bags and give to friends with the recipe and use the remainder to make a great volume of Amish Friendship Bread yourself - 2 loaves.

        This can continue endlessly until you run out of friends and the whole city has been supplied with this growing store of starter,  and your brother Eli is packing a loaf around his middle.

        We dogs decided that if it's a starter kept at room temp where flour is added periodically to "feed" it, then it's sourdough, Amish or not. We were, of course, correct, as dogs have a nose for this kind of thing. So to bring a little variety into this situation, we used the starter for Sourdough Pancakes.

        We took this recipe from the Sunset Book of Breads, circa 1977, when our girl was still just a pup herself, cooking up what-have-you in the country home of her childhood. We adapted the recipe for hound purposes, otherwise it would be violatorious of copyright and such:

        Amish Hound Cakes
        (also known as Amish Friendship Sourdough Pancakes)

        1/2 cup sourdough starter (aka Amish Friendship Bread batter)
        1/2 cup whole wheat flour (or white)
        1/2 cup whole wheat pastry flour (or white)
        1 cup sour milk (or buttermilk) (or fresh milk with 1 tsp lemon added to curdle)
        1 egg
        2 tablespoons milk
        2 tablespoons oil
        2 tablespoons sugar
        1/2 teaspoon soda
        1/2 teaspoon salt


        Mix starter, flours, and sour milk in a bowl and let sit at room temp 45 min. (or refrigerate overnight).


        Beat together eggs, milk and oil. Stir in to flour mixture. Combine sugar, soda and salt and stir in to batter. Let stand 5 minutes. 


        Cook on an oiled griddle on medium high heat til pleasantly browned. Serve to friends with real butter and maple syrup. 

        Notes from Guthrie: Sourdough cakes tend to be tangier in flavor and but thinner in texture than your usually fluffy breakfast cakes.

        Notes from Elias:  We should just do dog recipes from now on since we can't even eat this one. Canines and baking soda don't mix. Keep this on your human plate not in the doggie dish.

        24 August 2009

        ~ Peach Pie Filling to Freeze

        Dear Fans of Hounds Who Cook,

        We hounds have been immensely pleased at all of the peach parts we've been partaking of as our girl readies them for various sundry purposes. Tonight she found a recipe to freeze up pie filling in advance so that in the winter we will have fresh peach pie at the most uncanny time.

        Here it is. We'll let you know how it works out.

        Peach Pie Filling
        • 2 1/2 cups sliced peaches
        • 3/4 cup white sugar
        • 1 Tb. cornstarch
        • 1-1/2 tsp.  Tapioca flour (or 1 Tb. minute tapioca)
        • 1 tsp. nutmeg
        Toss all together and freeze in an aluminum pie tin. When frozen, release from the pie mold and place in a ziploc freezer bag.

        To bake the pie, drop frozen filling into a prepared pie crust. Cover with top crust or lattice crust. Brush with milk or egg white and sprinkle with sugar.

        Bake at 450 degrees for 20 minutes on the bottom rack of the oven. Reduce temperature to 350 degrees, and bake 30-35 minutes longer.

        10 August 2009

        Putting Up The Peach

        Dear Fans of Hounds Who Cook,

        It's an exciting night in Eau Claire, Wisc. We have 18 pounds of peaches, countless bushels of apples, 4 pints of raspberries and 3 pounds of blueberries. We are putting up, as they say. Putting up preserves. With so much bounty, it's hard to know where to start. We found recipes for canning peaches AND making jelly from peach pits and peels, so that's where we're starting. We have apple pectin jelly made the other day and are going to use that to stiffen up the peach juice for jelly.

        First we are sterilizing jars. They've already been washed, so we'll just put them through the dishwasher (no soap) so they're hot when we put in the peaches.

        Next we'll skin the peaches, saving pits and skin for a "peach pit jelly" recipe we found. Who knew?!

        Boil a pan of water. Whilst you're at it, clip on your jelly thermometer and make sure that when the water it boiling, it reads 212 degrees. If not, note the discrepancy and make sure you adjust your jelly boiling temp later. Our thermometer reads 220. No wonder we made some stiff jelly yesterday. We will deduct 8 degrees from the temp we cook to henceforth.

        There are Several Ways to can peaches, and here are a few. We are doing some of each and will report back with the results in the pup notes at the end.

        COLD PACK PEACHES

        Preparing Peaches
        0. Prepare a peach holding tank of: 2 qt filtered water, 1 Tb vinegar, 1 Tb salt
        1. Wash peaches and rinse well.
        2. Dunk and roll a peach in boiling water. Take it out after you count to about 20 and slip the skin off into the skin-saving pile. (You can let it cool so as not to burn your paws.)
        3. Drop the whole peach into the prepared holding tank
        4. Cut the peaches in half and remove the pit. Scrape out the fibrous pit clingers on the peach half - they may turn brown in the jar. We cut the peaches into wedges since ours did not readily release from the pit. Leave them in the holding tank.

        Prepare the Syrup
        2-1/4 cups sugar (we used 1 c. sugar and (4) 1/32 tsp stevia)
        5-1/2 cups of water.

        Heat on the stove to dissolve the sugar and keep it hot. This recipe covered our 4 pints plus one near-quart jar, with a few tablespoons leftover.

        Pack the Peaches
        Drain the peaches and pack them into hot jars cavity side down in overlapping layers. Leave about a ½” head room and ladle hot syrup over the peaches. Leave about ¼” head room left.
        Remove air bubbles using a knife. Cover the jars with rings and lids kept in boiling water.

        Process in a boiling water bath for 20 minutes. Set jars on a cooling rack with cloth underneath to catch water drips - leave space between jars so air can circulate.

        Notes from Guthrie: This is called cold pack because the peaches aren't cooked, but between skining them in boiling water and pouring hot syrup over, and then the canning bath, they are actually cooked. We read that these won't keep their beauty as much as hot pack peaches. Before we try hot pack, we're going to retry this one without the boiling water to peel. We found it made the peeled peaches a little mushy on the outside and hard to cut into wedges without ruining their form.

        HOT PACK PEACHES

        Use the same procedure as above, but instead of packing peaches in jars, add peaches to syrup in the pan and bring to a boil. Then pack into jars. Cover. And process in the canner.

        25 July 2009

        -French Dressing

        Dear Fans of Hounds Who Cook,

        We are stirring up some staples tonight for a weekload of company coming. This French Dressing was found at bigoven.com, a site we have never been to before. We've adjusted it according to our tender palates, especially nixing the sugar and using stevia in its stead.

        French Dressing

        1 1/3 cup sugar/stevia equivalent
        4 teaspoon paprika
        2/3 cup catsup
        1/2 cup apple cider vinegar
        1 cup extra virgin olive oil
        1 small onion
        1-2 tablespoons of lemon juice

        Blend all ingredients except the oil in a food processor until smooth. While food processor is running on slow speed drizzle in oil until blended. Refrigerate for 2 or 3 hours to let flavors blend.

        Guthrie's Note: We didn't add salt or pepper to ours, but did add a cup of tomato juice we had to use up. This made the flavor less intense so we added a big tablespoon of tomato paste to balance it out. We also used stevia rather than sugar and it was capital.

        Eli's Note: I concur with my younger brother.


        -Black Bean Enchilada Bake

        Dear Fans of Hounds Who Cook,

        While we hounds are daily carnivores, we understand the human's fragile psyche and need to vary its diet to non-meat items. Some people, such as our soon-coming visitor, eat no meat at all. We will be interested to see if she is has a tendancy to prowl and amble. This is what happens to us when we have a severe shortage of meats. In any case, we've prepared an absolutely tasty meal which will agree with her palate.

        Black Bean Enchilada Bake

        * 2 cups chopped onion
        * 1 1/2 cups chopped red pepper
        * 2 garlic cloves, minced
        * 3/4 cup salsa
        * 2 teaspoons ground cumin
        * 2 15.8 ounce cans black beans, drained
        * 12 6-inch corn tortillas
        * 2 cups cheese shredded (we used cheddar/Monteray Jack)
        * 24 ounces stewed tomatoes
        * 1/2 cup sour cream (optional)
        * 1/2 cup sliced black olives (optional)

        Saute in their own juices for three minutes: onion pepper, garlic, salsa, cumin, black beans and tomatoes. Arrange 6 tortillas over the bottom of a 9" x 13" baking dish, overlapping. Spread half of bean mixture over tortillas and sprinkle with half of the cheese. Repeat with remaining tortillas, bean mixture, and cheese.

        Cover dish with foil and bake 15 minutes. Carefully remove foil and serve warm.

        Garnish with sour cream and olives.

        Notes from Eli:When baked and frozen and reheated, the corn tortillas became corn mush, so be prepared for that if you must freeze.


        24 July 2009

        - Peanut Butter Cookies

        Dear Fans of Hounds Who Cook,

        Tonight for the first time in the life of we hounds, we made our own peanut butter. Guthrie would have eaten it all right away, but the little person visiting had the good idea to make it into cookies. Our Girl is launching into what she calls a no-gluten diet, so she was happy to make this flourless recipes. Thankfully the first batch was a little singed so guess who will get those for breakfast tomorrow? Happy pups. We searched and searched the Internet and found this recipe so prevalent that we're not even attributing it. It's a most awesome Flourless Peanut Butter Cookie Recipe. Gooter it (he means Google it) and you'll see what we mean. It's everywhere. It's as though every hound on earth knew about this recipe except us. We'll give you hound tips and tricks though to make it worth your while.

        First off, if you have the likes of a Champion juicer, do as we did and grind your own peanuts. It makes such a chewier, better cookie that you might grind your own peanut butter ever after too.

        Second off, if you grind the peanuts and make cookies right away, you made need to refrigerate the dough in order to be able to roll it into balls. We did.

        Flourless Peanut Butter Cookies
        Me's Independent Rating: 3 of 3

        2 cups ground peanuts or natural peanut butter

        1 cup white sugar (or stevia equivalent)
        1 cup brown sugar
        2 eggs
        2 tsp. baking soda
        (add salt if you ground unsalted peanuts)


        Cream sugars, eggs, and baking soda (and salt, if desired). Thoroughly blend in peanut butter.
        Chill dough if necessary to form balls. Use an ice cream scoop for large cookies. Press down with a sugared fork. Bake at 350F for 8 minutes.

        Notes from Guthrie:
        Err on the side of Undercooking these delicacies. If overcooked they are well suited (though too sugary) for dog treats.

        Notes from Elias:
        Make sure you buy peanuts to grind that do not have seasonings or additives. We bought two big jars and took one taste and wondered at them. They had MSG and cornstarch, among other undesireables, and even paprika for flavor. We don't recommend a paprika flavored cookie.

        23 July 2009

        - Pectin Jelly with Green Apples and Sauce

        Dearly Loved Fans of Hounds Who Cook,

        We are all astir over a newfound way to use the green apples that are falling in the yard. They are not yet ripe and sour with a hard texture. We know there will be apples a plenty for saucing in a month, but we eager hounds want to cook up a little something now. So we searched (and searched) the Internet and found exactly what we were looking for. First, very important information about the Healthful properties of unripe apples (see here), and then a recipe for pectin jelly (see here) which you can eat as it is OR use when making Conserve with the berries you are picking right now, or in the next weeks. We found Miss Lindy's narrative instructions hard to follow, so we are recipifying it all right here for your convenience and ours:

        July Pectin Jelly
        for eating and the preservation of fruits

        7 pounds green apples (such as crabapples in late July)
        13 cups water
        8 cups sugar (or stevia equivalent) (or 4 cups per quart of juice)
        1 large lemon

        Wash green apples and pluck off stems - they are bitter and maybe even toxic, we're not sure. Cut in quarters, leaving on the skin. Bring nearly to a boil, then turn down and simmer 30 minutes. Press all through a jelly-making cone-shaped sieve with the help of a dowel. Then (who could imagine?) hang it all in a jelly bag and catch the juice. This they said would yield 2 quarts of clear apple juice but for us it was only one. Chill for sediment to sink to the bottom. Reserve apple pulp for the applesauce recipe below.

        Sterilize 8 1-cup jars in a dishwasher or canner, and lids with rings.

        Pour clear juice into big old saucepan, cast aside sediment into the pulp pile for the applesauce recipe below. Add the juice of 1 lemon and sugar or stevia. Bring to boil. Boil on medium high or high heat for 10 minutes or until temperature reaches 220 degrees F. Skim off foam throughout the boiling extravaganza.

        Pour jelly into sterilized jars. Wipe rim with a wet cloth and screw on lids. Turn jars upside down for 5 minutes and then back up to foster sealing. Make sure the lids seal - the middle button should be contracted and not give (or boing) when you press down on it.

        Apple Sauce
        Run the apple pulp and sediment from the jelly recipe through the jelly-making cone-shaped sieve with wooden dowel again. Add sugar (or stevia, our preference) to taste. Store in fridge or heat it up and can it.

        09 May 2009

        - Glazed Bison Meatloaf

        Dear Fans of Hounds Who Cook,

        It's been a good while since we posted a taste treat. We've been out chasing rabbits, of course, since it's spring and have had no time at all for our finer intellectual pursuits. I, Elias, am penning this now while Guthrie rests in the Forbidden Chair. If our Me sees him there will be a scuffle. She doesn't want his special scent on her recliner.

        This is a recipe we've been eager to make again and houndify it. First of all, there's nothing better than a nicely seasoned meat loaf. But this has the thick flavorful tomato topping on it too. Almost too good to believe. We started with one of our favorite sources - Cook's Illustrative - and doctored it up for the hungry hound palate. (Note that Cook's offers secret tips and tricks for meatloaf that we do not use here. So it's in your best interest to check out their version too - especially if you use beef not bison.)

        Eli's Glazed Loaf of Bison

        For the Loaf:
        3 ounces hard cheese , parmesan, romano, asiago or the like, freshly and finely grated
        1 tablespoon unsalted butter
        1 cup finely choped onion
        1/2 cup finely chopped celery, including leaves
        1 medium clove garlic , minced
        2 teaspoons thyme
        1 teaspoon paprika
        1 teaspoon turmeric
        1/2 cup low-sodium chicken broth
        2 large eggs
        1 tablespoon soy sauce
        1 teaspoon Dijon mustard
        2/3 cup bread crumbs or crushed saltines
        2 teaspoons parsley
        3/4 teaspoon sea salt
        1/2 teaspoon ground black pepper
        2 pounds ground bison

        For the Glaze:
        1 cup ketchup
        2 teaspoons hot pepper sauce
        1 teaspoon ground coriander
        1/2 cup raw apple cider vinegar
        6 tablespoons packed light brown sugar


        1. Grate cheese, sprinkle on a plate, and place in the freezer until ready to use.

        2. Heat butter in 10-inch skillet over medium-high heat until foaming; add onion and celery and cook, stirring occasionally, until beginning to brown, 6 to 8 minutes. Add garlic, thyme, paprika, and turmeric. Cook, stirring, until fragrant, about 1 minute. Stir to scrape up browned bits from pan, until thickened, about 1 minute. Transfer mixture to small bowl and set aside to cool.

        3. Whisk broth and eggs in large bowl until combined. Stir in soy sauce, mustard, bread crumbs, parsley, salt, pepper, and onion mixture. Crumble frozen cheese over mixture. Add ground bison; mix gently with hands until thoroughly combined, about 1 minute.

        4. Spray a loaf pan well with oil. Transfer meat to pan, rounding into a loaf shape (higher center, lower sides). Bake until an instant-read thermometer inserted into center of loaf reads 135 to 140 degrees, 55 to 65 minutes. Don't overcook. Remove meat loaf from oven and turn on broiler.

        5. While meat loaf cooks, combine ingredients for glaze in small saucepan; bring to simmer over medium heat and cook, stirring, until thick and syrupy, about 5 minutes. Set half of the glaze aside for serving on the side.

        6. Spread half of the remaining glaze evenly over cooked meat loaf with rubber spatula; place under broiler and cook until glaze bubbles and begins to brown at edges, about 5 minutes. Remove meat loaf from oven and spread the other half of the remaining glaze; place back under broiler and cook until glaze is again bubbling and beginning to brown, about 5 minutes more. Let meat loaf cool about 20 minutes before slicing.

        Notes from Elias: You can see that we used a wok to make the glaze, which worked wonderfully for thickening up the sauce around the edges. We also wanted to have a small meatloaf to freeze, so we put 2/3 of the meat mixture in our Grandma's loaf pan and 1/3 in a separate pan that we can simply cover and freeze. Since we used glass pans, we cooked it at 350 degrees. The picture here is after the loaves were already happily in the oven for 20 minutes.

        We added turmeric because it seemed like it would do nicely in the array of spices, and the elder woman has been asking us to cook with more turmeric for its resounding health benefits (like preventing cancer, helping "retrain" damaged cells to heal, helping in weight loss...it's almost like we should develop a recipe for turmeric loaf...)

        Notes from Guthrie: We are on a cooking rampage for Mother's Day, which is tomorrow and everyone is coming here to honor the family mothers, that's why I was resting. And I didn't think the Girl would mind me being on her chair since it was draped with a protective cover. I think I'll mix up a little Tuna Salad and add that recipe next.

        Love,
        Elias and The Gute,
        Your faithful, handsome, hungry hounds

        19 March 2009

        - Key Lime Pie


        Dear Fans of Hounds Who Cook,

        We dogs have a visiting guest (pictured) so we made a celebratory pie. Anytime the pack grows, it's a good thing, even if you do get displaced from your alpha position.

        The new guy is called Yogo. Here he is with us hounds. He is not a hound, but his ears do flop some, which is one of the more endearing characteristics of a dog and why hounds are so at the top of the desireability scale.

        The elder is coming for dinner tomorrow so we'll serve him this good pie and he's bound to be impressed.

        Susan's Own Key Lime Pie

        Graham Crust
        3/4 cup graham cracker crumbs
        1/2 cup slivered or ground almonds
        1/4 cup sugar
        1/4 cup butter, melted

        Preheat oven to 350 degrees. Butter the bottom and sides of a 9-inch pie pan. Mix dry ingredients for crust and stir in 1/4 cup butter, melted. Press into bottom and sides of pan. Bake until lightly browned - 8 to 10 minutes. Cool completely.

        Key Lime Filling
        3 large egg yolks
        1-1/2 cup sugar
        1/4 cup flour
        3 tablespoons cornstarch
        1/4 teaspoon salt
        2 cups water
        1 tablespoon butter
        1/2 cup key lime juice (fresh squeezed!)
        finely grated peel of 1 lime

        Beat egg yolks in a small mixing bowl.

        In a saucepan over medium-low heat, combine the 1 cup sugar, flour, cornstarch and salt; gradually stir in the water. Cook, stirring constantly, until thickened. Gradually stir about 1/3 of the mixture into the beaten egg yolks; stir mixture into the remaining hot mixture in the pan. Continue cooking over low heat, stirring, two minutes. Stir in the butter, lime juice and peel and cool slightly. Pour into the baked pastry shell and cool. Cover and refrigerate overnight.

        28 February 2009

        - Dogs Who Eat Raw

        Dear Fans of Hounds Who Cook,

        We've had a big fluff of a snowfall in our corner of Wisconsin. First all the snow melted and we dogs felt like it might be spring. We didn't even mind the dampness on our paws because a hound knows that spring brings one thing: rabbits. The Gute will get delirious with want if he hears me say that. So at first we thought rabbits might be soon coming and we were eager to just sit in the melting out of doors and survey the world from our backyard.

        Then we had occasion to take our girl Me to the dog park. She recently purchased a pedometer and is now interested in how many steps are everywhere. (It is 1,000 to go around the pup park once. Now she is eager to go around 3 and 4 times instead of 2 because she feels so much accomplishment with the pedometer.) We dogs don't need a pedometer. We have internal meters that tell us 20,000 steps and the girl wants us to come in from the woods; 40,000 steps and we might come in; 100,000 steps and she's going to be real mad at Gute for not coming back at 50,000 steps.

        Well, in other news, our girl Me is in a play and this coming week she will be absent most of the time. So today we are mixing up another batch of dog breakfast goodness so we have aplenty for the week of her negligence. We've modified the recipe from December and here it is for your plenteous enjoyment.

        This concoction is based on a whole-diet formula of 10-20% organ meat, 5-10% bone (based on the pups bowels, you could say), 70-80% muscle meat (with a little skin and ligaments and as much cartilage as a bird has to offer) and only 5% vegetable. (50% of the aforementioned Meat and most all of the bone is eaten at suppertime in the form of tasty bird necks. Only 57 cents a pound, and that makes our girl happy.) Some say the meats and organs should all be from the same source - like all chicken/turkey or all beef or all pork (don't feed your pups pork unless you have a special extra good source like an organic farm - pork isn't really fit for dogs. Or girls.) We mix it up as we buy whatever's cheap.

        The Raw Breakfast Meal of Hounds

        8 oz liver
        8 oz gizzards
        22 oz muscle meat (with some skin, ligaments, cartilage)
        12 oz vegetables (as great a variety as you can - roots and above ground - but NO mushroom or onion)
        1/2 cup apple cider vinegar
        3 garlic cloves
        1 tablespoon kelp powder
        1/2 c. yogurt
        3 eggs with shells

        Grind the meats together in a meat grinder. Mince the vegetables in a blender with the apple cider vinegar, garlic, kelp, yogurt, and eggs with shells. The finer they mince, the more nutrients we dogs can garner from them. Blend nicely with the ground meats and spoon into muffin pans, piling 5 oz in each. We also make some in ice cube trays for days when a dog deserves a treat.

        Notes from Eli: We think this food is fine. It's not the right combination for the cat, however, so we always know if he's been in our food. He throws it up. A cat ought to know better.

        Notes from the Gute: This is a tasty food. We especially like the frozen chicken necks (partially thawed, but the frozen part makes them easier for me to chew them up and cleans my sparkly whites too). We would like to add that a girl needn't go to all of this trouble as a hound would be just as pleased if not more so to just have one rabbit carcass per day. Or two if they're small.

        07 February 2009

        - Scalloped Potatoes and Ham

        Dear Fans of Hounds Who Cook,

        We dogs had the sheer delight of making Scalloped Potatoes and Ham tonight. Elias calls them "Escalloped," to be a little pretentious. I would have called it Cheesy Potato Goodness and Ham, but it's a classic recipe that deserves its respectful name.

        Our Girl Me had been on the lookout for ham with this dish in mind. Some recipes use all out whipping cream which we know would be to die for, but in more ways than one. So we opt for the lesser fat but just as creamy-wonderful variation.

        We found the recipe on epicurious.com but changed it to suit our houndish tastes. Enjoy like us!

        (E)Scalloped Potatoes and Ham
        1 cup shredded cheddar cheese (we used raw white cheddar with cilantro and garlic)
        1 cup shredded hard cheese (we used asiago, you can use parmesan)
        4 pounds russet potatoes, peeled and sliced 1/4-inch thick
        1-1/2 teaspoon sea salt
        1/2 teaspoon black pepper, freshly ground
        1/4 cup thinly sliced shallots
        3 tablespoons whole wheat flour
        4 tablespoons butter
        1 pound ham steak, cut in 1/2 inch cubes
        3 cups whole milk

        Spray a 13x9 pan with oil. Arrange half of the sliced potatoes in the pan, overlapping edges. Dot with half of the butter. Sprinkle with half of the salt and pepper. Cover with shallots and cubes of ham. Sprinkle half of each type of cheese over this layer. Layer remaining potatoes atop these and sprinkle with remaining salt and pepper. Reserve remaining cheese for later. Pour milk over all.

        Cover pan tightly with aluminum foil and bake at 400 degrees for 45 minutes.

        Remove foil - milk may have separated (no worries). Sprinkle with remaining cheese and cook uncovered 45 more minutes til bubbly, browned, and fragrant. Cool 10 minutes before serving.

        We don't know if this can be reheated. We'll tell you tomorrow.

        Your Hound and Dutiful Servant Chef,
        King Guthrie, The Gute

        03 January 2009

        - Stuffed Mushrooms

        Dear Fans of Hounds Who Cook,

        We dogs don't eat mushroom as they are a deadly poison, but Me made lovely stuffed ones for her elder people tonight which she pulled together out of nothing - skipping half of the ingredients in the recipe, which she didn't have, and they were rumored to be as tasty as could be. Here's what she did:

        Stuffed Mushrooms

        7 or 8 large button mushrooms
        1/2 cup extra virgin olive oil
        1/4 cup balsamic vinegar
        1/4 braggs amino acids (or shoyu sauce)
        1 garlic clove, crushed
        pepper
        thyme

        2 tablespoons canola oil (for high heat)
        1/2 cup minced onion
        1 garlic clove, crushed
        1/4 cup finely grated Parmesan cheese
        1/4 cup dry bread crumbs
        2-3 oz. goat cheese or feta


        Whisk first 6 ingredients in medium bowl for marinade. Pull stems from mushrooms and place stems in processor. Arrange mushrooms, gill side up, in a single layer in a glass baking dish. Pour marinade over mushrooms and marinate 4 hours, turning to coat occasionally.

        Process stems until coarsely chopped. Heat 2 tablespoons oil in heavy large skillet over high heat. Saute onion about 3 minutes. Add garlic and stir 30 seconds. Add chopped mushrooms, sprinkle with salt, and increase heat to high. Cook until almost all liquid evaporates, stirring often, about 8 minutes. Season with salt and pepper. Transfer to large bowl; cool to room temperature.

        Add 1/4 cup Parmesan, and breadcrumbs to mushroom mixture; toss to distribute evenly. Add goat cheese and toss gently to distribute evenly. Season filling to taste with salt and pepper. Can be made 2 hours ahead. Cover filling and let stand at room temperature.

        Preheat oven to 400°F. Transfer marinated mushrooms, with some marinade still clinging, to rimmed baking sheet, gill side down. Roast until beginning to soften, about 15 minutes. Turn mushrooms over. Divide filling among mushrooms. Sprinkle additional Parmesan cheese over and bake until heated through and cheese begins to brown, about 15 minutes.